

How To Change An Image To Monotone In Photoshop
As yous're working on your next site design, there's a common blazon of background you may be considering: photography. While this trend isn't necessarily unique, information technology sure is constructive at setting a scene and immersing a user into the surroundings of a site. "If you lot're looking for a way to use photography merely with a little more than pizazz, you could ever endeavor a duotone image – they're both interesting to await at and piece of cake to create! "
Before we learn how to create a duotone image in Photoshop, let's dive a little deeper into this design tendency.
What is a duotone image?
At its core, a duotone is but an image that's made of ii colors. You've probably seen them before in campaigns like Spotify's 2015 Year in Review.
This is condign increasingly pop, especially amid agencies and smaller brands. Duotone effects are a great mode to incorporate and reinforce your brand and its colors throughout your work and your website. To requite y'all a niggling inspiration, LPK shows wonderful example of how to apply this.
If you're interested in trying out this technique, y'all'll want to be strategic in the photo y'all choose to manipulate. While technically you can employ the duotone consequence to any photo, it'll look better on an prototype with lots of contrast. I'd too recommend using an epitome with a solid background, preferably white—that makes it easier to establish the base of operations color you're looking for!
If you lot have access to a studio and are interested in taking custom photos, only keep these tips in heed while you set the scene. If you're working with existing content, you tin can ever manipulate the photo first to heave the contrast or alter the groundwork color.
- If you're interested in joining the class and downloading the free Photoshop resources, leap to this section!
- If yous've already joined the grade, click here to jump straight to the template tutorial!
For the rest of the tutorial, I'1000 going to embrace two methods y'all tin can apply to manually create a duotone image in Photoshop. The first is the built-in Photoshop option (works fine, but non my favorite) and the second uses a slope map (my preferred method, unless you're using our complimentary activity of course!).
Once you're fix, load your epitome into Photoshop and create a duplicate layer of the photograph. Past editing the duplicate (instead of the original, bottom layer), yous'll e'er have an unedited version of the photo to autumn back on.
Set to create a duotone image in Photoshop? Permit'southward get started.
How to use the default Photoshop duotone option
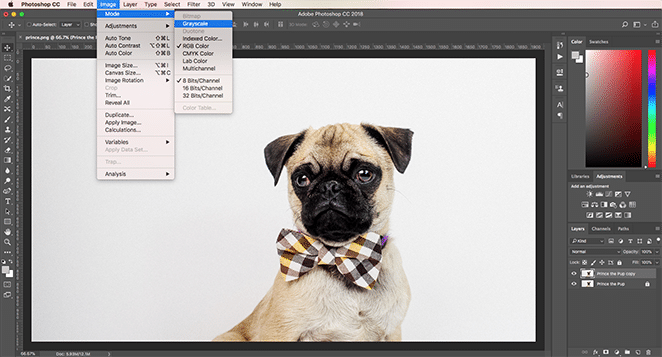
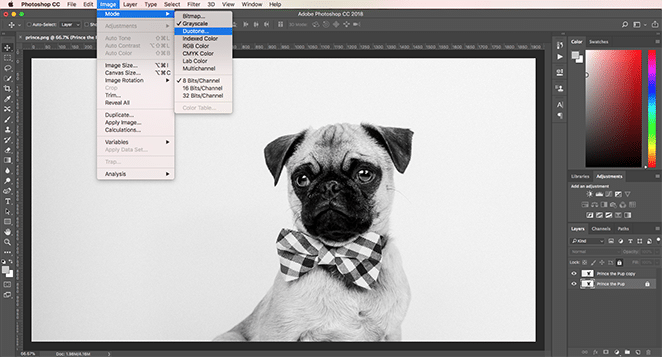
1. Catechumen the image to 8 bit grayscale
In order to use the duotone option that's built into Photoshop, first you lot'll have to convert the image to an 8 bit grayscale. Select the copy of your photo and caput up to Paradigm > Mode > Grayscale. Likewise verify the eight bits/Aqueduct option is selected under the aforementioned Way menu.
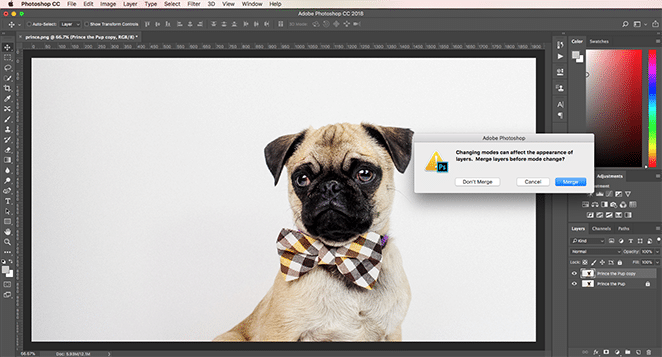
When yous select this option, a couple notifications are going to pop up. The first asks if you lot want to flatten the image or merge the layers before changing the color style. If y'all accept a lot of layers, the color change could affect how things brandish (in which case flattening could exist helpful for preserving your piece of work), simply in this case, don't worry about flattening the prototype. If you want the original copy, don't merge your layers.
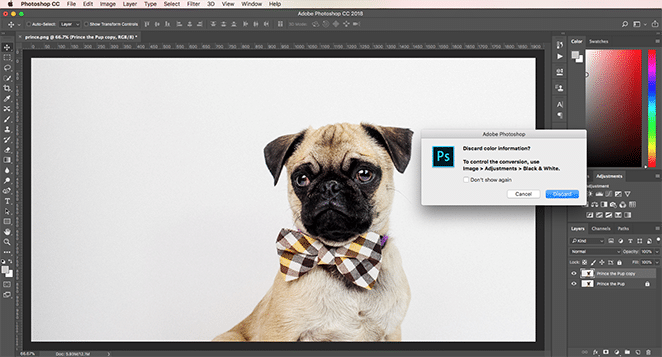
The next notification asks if you want to discard color information. Yous'll have to practise this in order to use the default duotone selection, then go ahead and click "Discard."
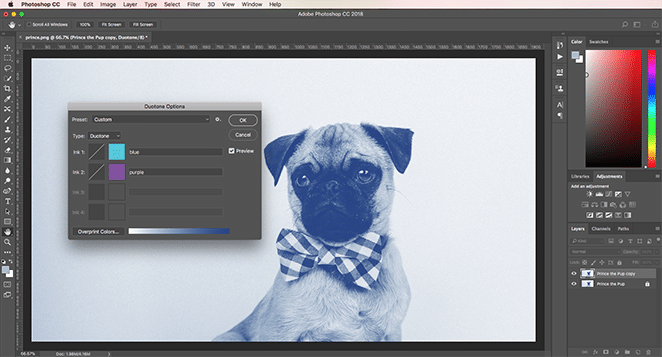
2. Convert the paradigm to a duotone
One time your paradigm mode is in an eight bit grayscale, y'all can employ the default duotone selection in Photoshop. Select the layer, and and so get to Image > Mode > Duotone.
three. Select your colors
Once the image is in duotone mode, you lot can outset selecting your colors. The nice function is that every bit soon as you select a new colour, the prototype will update so you can meet how things expect (as long as the Preview checkbox is checked). Beyond that, the process starts to get a little clunky. Y'all technically can suit the curves for each colour, but the image doesn't update in real-fourth dimension, making it a little difficult to see what'south happening and resulting in a lot of back and along. Play with the colors and settings until you find the desired effect.
I'd suggest playing around with these settings for a infinitesimal, just to go a feel for them, merely once you're ready, let's move on to the second method for creating duotones in Photoshop.
How to employ a Gradient Map to create a duotone
1. Apply a Gradient Map
For this method, you won't need to worry nigh altering the image or choosing a specific colour mode. Of course, if you lot practise desire to edit anything, become alee, but the photo volition piece of work fine just as it is. When you're ready, select the re-create of your image and get up to Image > Adjustments > Slope Map.
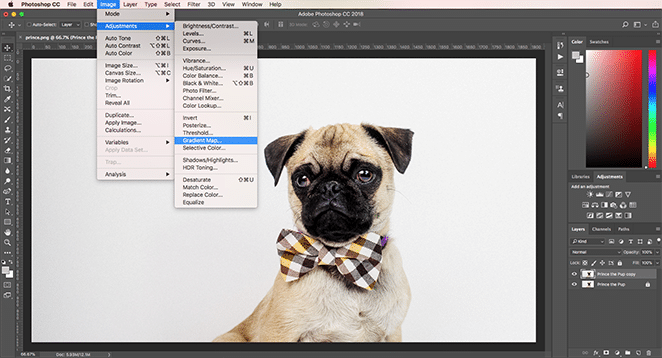
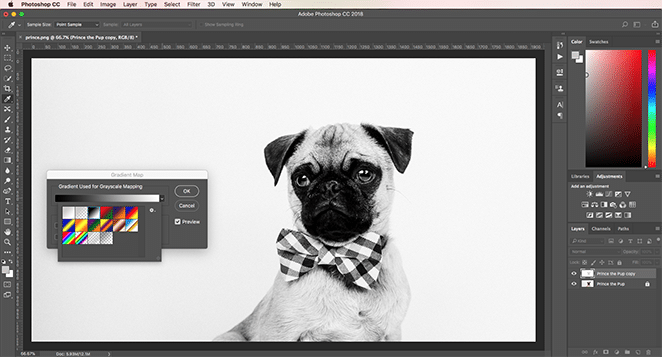
Depending on your default setting, this setting will overlay the image with a gradient for a grayscale mapping. If the default is non black and white, click the dropdown and select that option. If y'all followed along for the first method, you'll come across that we're already halfway to creating our duotone.
Pro-tip: See the checkbox side by side to Reverse? Past clicking that, you'll invert the colors in the photograph. For this tutorial, we'll leave information technology unchecked, but if nosotros wanted the groundwork to exist darker than the subject, that pick can assistance you switch things upwardly.
ii. Choose your colors
By clicking on the gradient bar, yous'll open the Gradient Editor in a new window. Here you tin can select your colors and adjust how they display over the paradigm.
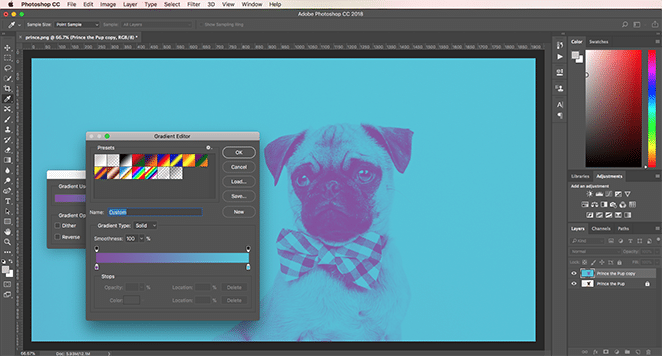
Equally yous can encounter, the final images look quite a fleck unlike from each other, merely both consequence in wonderful duotones. I adopt using a Gradient Map simply considering it'south a little easier to control the intensity of the colors and where the dark and calorie-free tones go, but both methods are easy to utilize.
Bring together our 2019 Spider web Design Trends grade for a free duotone Photoshop action!
If you're looking for a quick and easy resource to try out this trend, you tin can become the files in this tutorial, including an action with pre-fabricated gradient map options! Sign up with the class below to download the file, or click hither for more details about the course.
[optin-monster-shortcode id="dktout15rz4zcbcifnsl"]
Thanks for joining our Pattern Trends course!
Offset, download the Photoshop activeness hither.
How to use the Duotoner
Install the action
Once you've downloaded the action, double-click the file to install it. Open the image you'd similar to use in Photoshop, and then open the Actions window.
To navigate to the Actions window, select Window > Actions or hold downwards Shift + F9.
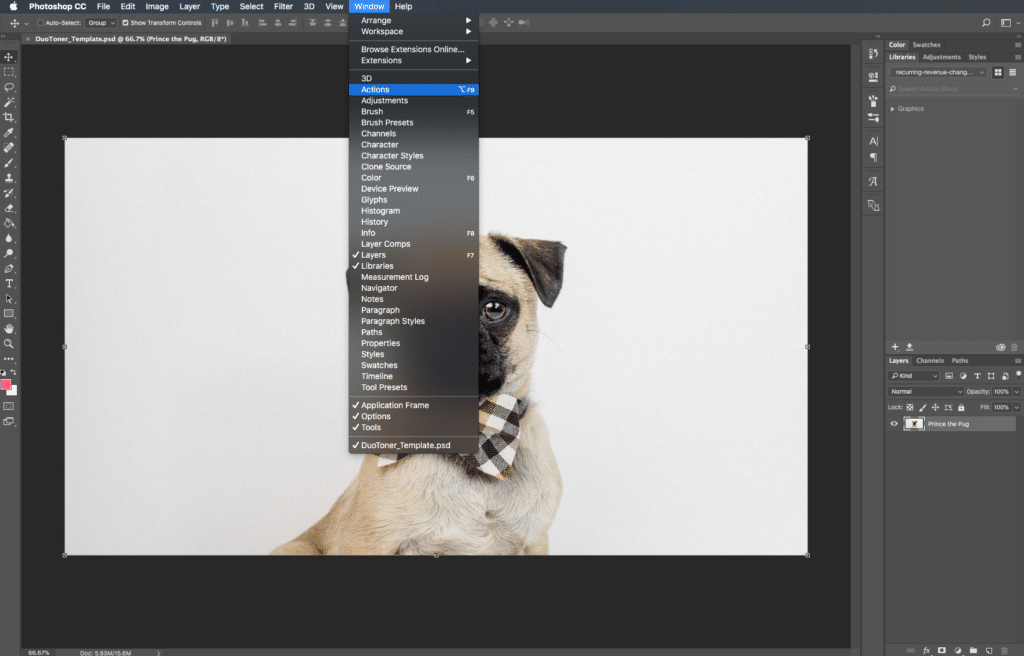
Once you've opened the Deportment window, select the prototype layer you want to apply the duotone effect to.
Select and play the action
Click the drop-downwardly on the "Flywheel – Glitch-a-tron" folder. At present, select "Glitch-a-tron – Select and hit play" and press the triangle play push at the bottom of the window.
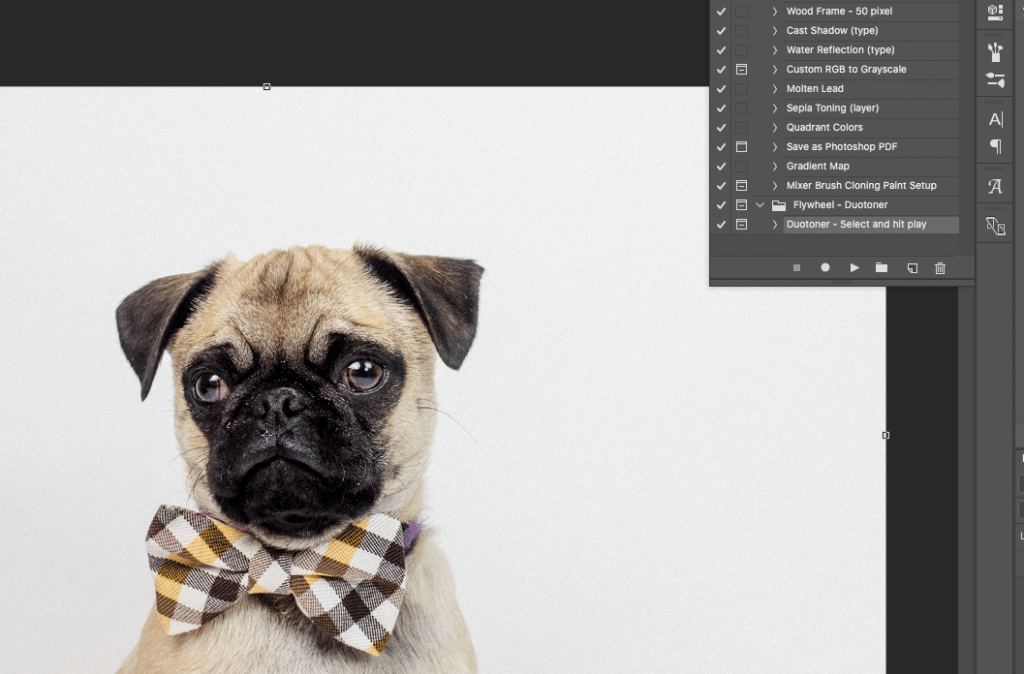
Once you hit play, you lot'll see a whole agglomeration of layers, each one with a dissimilar duotone color scheme! To switch, all y'all have to practice is make the layer you lot desire visible.
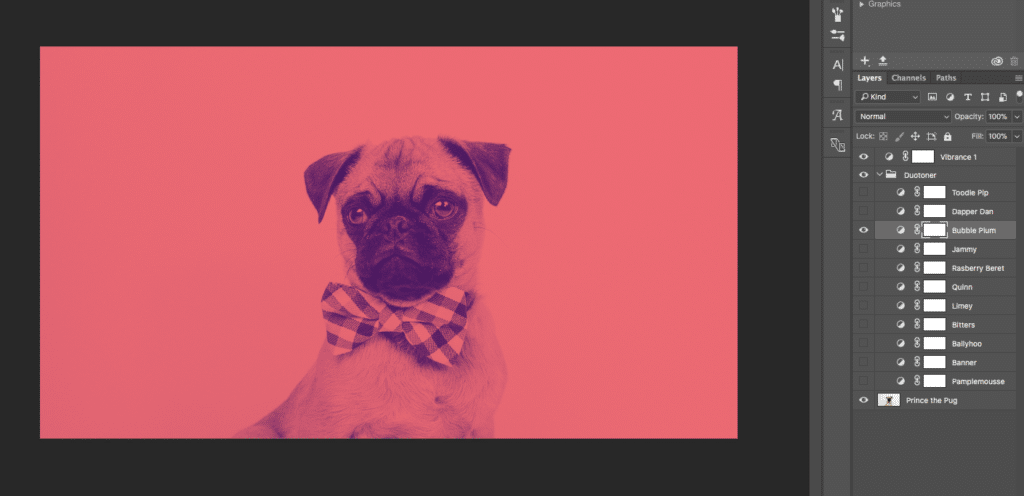
Note: If you lot have more than than 1 duotone layer visible, the colors will blend together and you may start to lose some of the detail of your photo. To go on things well-baked, brand sure y'all only take one layer visible at a time (or feel free to experiment past layering the duotones for a totally different effect!).
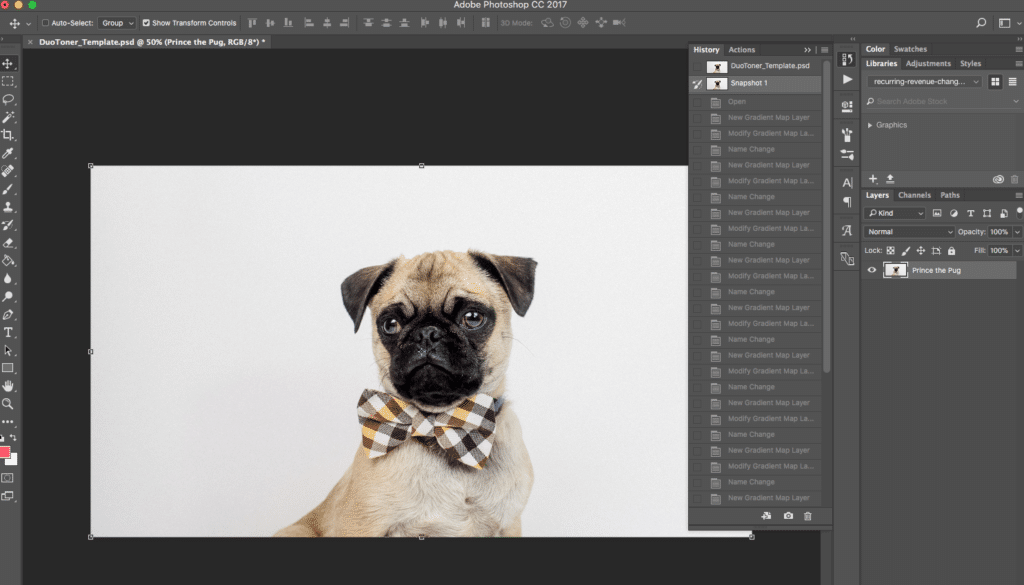
Bonus: Reset your epitome in a snap
Just in case you want to backtrack, the action automatically creates a screenshot that allows you to go back to your image before the action was practical.
Navigate to the History window past selecting Window > History. Roll up to the top, and click "Snapshot." This resets everything and then you're good to go!
What do you lot think of duotones? Exercise you think they're a strong pattern trend, or practice y'all prefer full-colour images? Share your thoughts beneath!
Download these free Photoshop files
Download the templates for free below!
Not certain what to read side by side? Check out this list:
- xiii web design trends for 2020
- How to optimize images for web: A pace-by-footstep guide for better site performance
- How to employ CSS and SVG clipping and masking techniques
- How to add a sticky back-to-elevation button to your website
Source: https://getflywheel.com/layout/create-duotone-photoshop-how-to/
Posted by: pryorperap1975.blogspot.com
0 Response to "How To Change An Image To Monotone In Photoshop"
Post a Comment