

How To Quickly Cut Out The Background In Bike Tire Spokes In Photoshop

Photoshop has a powerful set of selection tools that can handle nearly whatsoever cutout you care to throw them at. Occasionally, however, we're faced with an image that foxes the likes of the Quick Selection Tool and tin can exist listen-numbing and laborious to select with the Pen or Lasso tools.
This photo of a bicycle is just such an image. Cutting out the frame and the wheels is a fairly straightforward job for the Pen tool, or a combination of the option tools. When it comes to the spokes, however, it would be a horribly frustrating job. There is a quick way of tackling a task like this, notwithstanding.
Instead of painstakingly outlining the private spokes we'll switch to Quick Mask way and use one of Photoshop's oldest tools, the Pencil, to draw in the spokes. Once complete, leaving Quick Mask gives us a perfect selection that takes just a few minutes to create. The reason for choosing this over the Brush tool is considering, past default, the Pencil'southward stroke doesn't fade out like that of the brush, and then we get a line that remains the same width.
Let's go started. If you want to follow forth, the .psd image can exist downloaded here. The cycle's main selection has already been saved every bit an blastoff channel, and then you tin can load information technology up when required; unless yous fancy doing it yourself for practice. No, of form you don't!

Open up the epitome of the bicycle. Before we continue, we demand to make sure that Quick Mask is set up to the right display manner. Double-click the Quick Mask icon in the Toolbox. This brings upward its settings dialog. The default fashion is to display masked areas. We want to meet only the selected areas, so click its button. Click OK to set the mode.
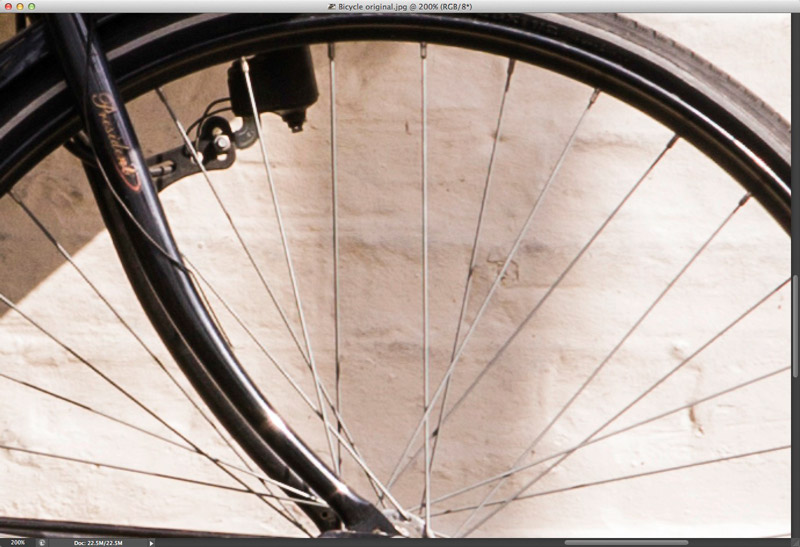
Catch the Zoom tool (keyboard shortcut Z). Zoom in to a section of the front wheel. We need to be able to see both ends of the spokes at all times for the technique to piece of work.
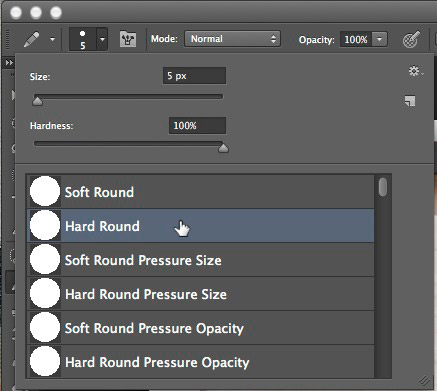
Catch the Pencil tool by clicking and holding the Castor tool icon in the Toolbox, or by pressing Shift + B on the keyboard to cycle through the tools. Go to the Options bar. Open the preset picker and choose the Hard Round preset.

We'll start by setting the brush size. Hover the cursor over one of the spokes. Utilize the foursquare bracket keys [ and ] to alter the width so it matches that of the spoke. It may not be a perfect fit but we tin can adjust it out later.
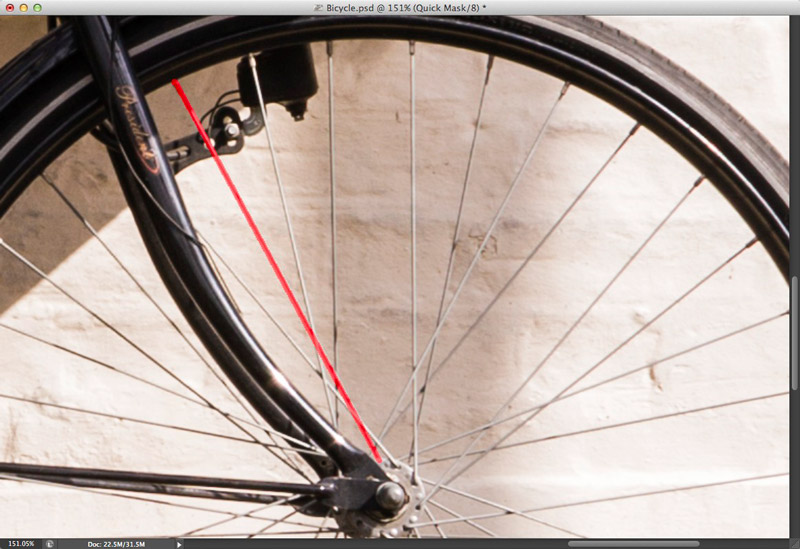
At present to make our showtime stroke. Double-check nosotros're in Quick Mask mode; its icon should be a solid circle, as opposed to a dashed i. Cull the first spoke to work on. Click one time at the very end where information technology meets the bicycle rim. Now follow the spoke to the other end where it'south attached to the central hub. Concur Shift and click once again. The 2 points will be joined upwards.

Move on to the next spoke and practice the same. Continue until all the spokes in the current section are complete. Hold down the Space bar to temporarily switch to the Manus tool. At present pan the image over to the next section. Release the Infinite bar and go on highlighting the spokes until they're all consummate.

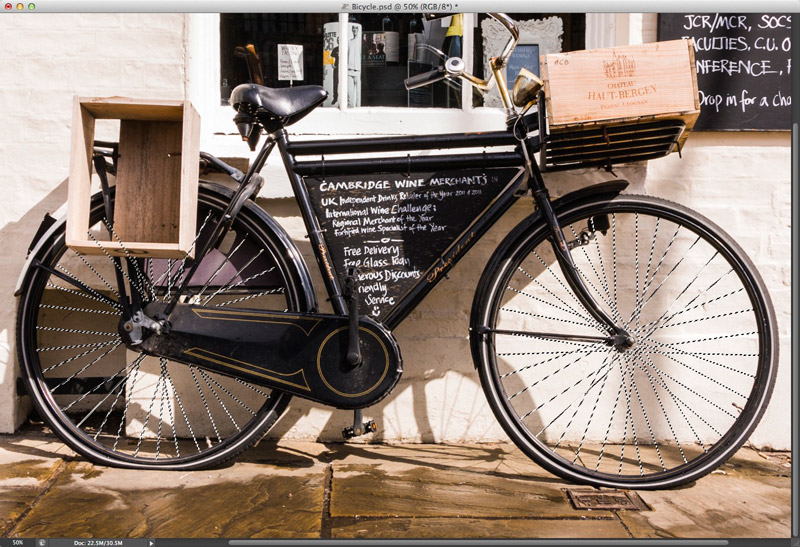
When the front wheel is complete, move over to the rear wheel and continue adding in the spokes. Don't worry if the lines overlap the other areas of the cycle, they'll be merged into the final selection.
One time all the spokes are consummate nosotros can leave Quick Mask by clicking its icon again, or past pressing Q on the keyboard. This creates a selection. Currently the option volition be jagged, as we used a hard edged brush; it'due south easier to alter it after that it would be to get it right at the time nosotros drew the lines.

Open the Refine Edge dialog from the Select carte du jour, or by pressing Cmd+Opt+r/Ctrl+Alt+r. Make sure all the values are at all fix to zero, in case they have been brought over from a previous session. The all-time view mode for the paradigm is Black. We can cull this from the drop-downwardly list, or by pressing B on the keyboard.

Double-click the dialog's Zoom tool to bring the view up to 1:one. Now use the Hand tool to bring 1 prepare of spokes into view. We can clearly see the jagged edges. Start by adjusting the the Smoothness, it doesn't need much, effectually 2-three works well. We'll add a slight plumage, again, a very small amount; around 0.3px. This has given us a much cleaner choice.
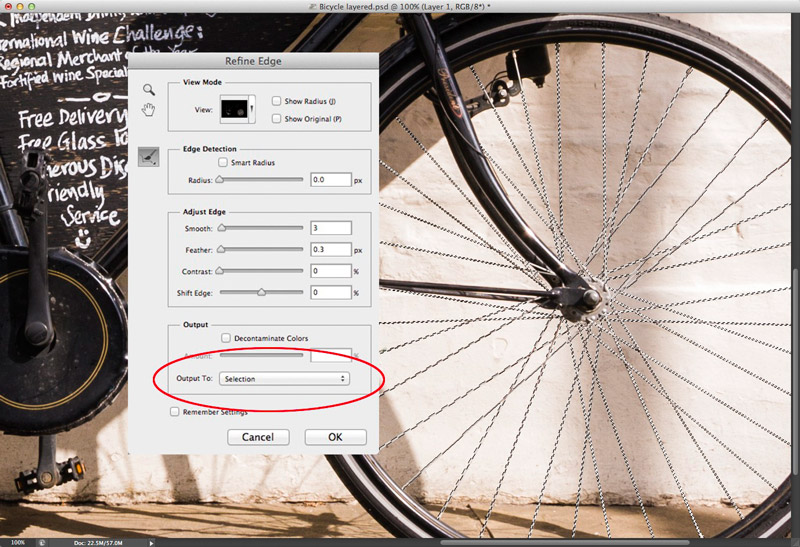
If the brush size was larger than the width of the spokes, we could use the Shift Edge slider to adapt it out but it seems OK hither. Click the Output To menu and set it to Selection. Now click OK. Nosotros don't come across any departure in the selection as the marching ants don't reflect such pocket-sized adjustments.

Get to the Select menu. Click Load Choice. We tin run into the saved frame selection in the Channel card. Become downwards to the Functioning settings. Choose Add to Choice. Click OK. Nosotros at present take the whole bicycle selected, including the spokes.

At this indicate it's worth saving the pick; nosotros wouldn't want to lose the work we've just done. Get to Select > Salve Choice. Make sure the Channel is gear up to New. Give it a name. Now click OK. We tin can save the image as a Photoshop or TIFF file to ensure the choice is saved with the file.

Now we tin can use the completed pick to extract the wheel from its background and place it somewhere new.
Source: https://www.tipsquirrel.com/tricky-cutout-grab-a-pencil/
Posted by: pryorperap1975.blogspot.com
0 Response to "How To Quickly Cut Out The Background In Bike Tire Spokes In Photoshop"
Post a Comment